
I have had my eye on buying a couple of bean bag style footstools for my patio for a couple of months, but couldn't find exactly what I wanted. So, I decided to make my own DIY version! Fairfield World has the Polyfil® Bean Bag Filler, and I figured that it would work to fill cubes sewn in nice fabric in the style I wanted for us to relax and put our feet up in the shade.

Here's what you'll need to make your Bean Bag Patio Poufs:

Supplies for EACH 15" square pouf:
Poly-Fil® Classic Bean Bag Filler – 2 Cubic Feet
Oly*fun Craft Material - 1 Yard
Upholstery Fabric - 1 Yard
1" Wide Twill Tape - 1/2 Yard (for handles)
Heavy Duty Thread
You'll also need:
Sewing Machine
Cutting Board, Rotary Cutter, Ruler
Large Pins, Needle
Scissors, Pinking Shears
Binder Clips
Paper and Tape for a Funnel
Bean Bag Patio Poufs Tutorial:
When making any bean bags, it's smart to make a "bladder" that holds the bead filler, and then place the filled bladder inside a cover. This serves two purposes - it keeps the beads from leaking out and it allows you to take to cover off if it is needing to be cleaned. The craft material Oly*fun is perfect for the bladder.

Cut 6 squares 16" x 16" from Oly*fun.

Sew 4 squares together side by side, and the sew the 4th square to the 1st square to form the 4 sides of the cube.

When sewing the sides together, begin and end the seams One Seam Allowance from the edge as seen here. Back stitch to reinforce the corner.

Sew the 5th square to the bottom edges of the 4 squares, to form the bottom of the cube.

Sew the 6th square to the top edges of the 4 squares to form the top of the cube, LEAVING A 6-INCH OPENING IN ONE SEAM. This opening will be used to fill the cube with bean bag filler.

You should have a cube of fabric that will be the bladder for the bean bag.

I wanted to make TWO poufs, so I went cut and sewed a second bladder for my other patio pouf.
Now you're ready to make the covers. I cut out two styles of upholstery fabric since I was making two patio poufs.

Cut 6 squares 16" x 16" from upholstery fabric. This is the smaller print I chose for one of them.

This is the larger print I chose for my other patio pouf. My fabric really frayed a lot, so I used pinking shears to keep the fraying to a minimum.

Sew 4 squares together side by side, and the sew the 4th square to the 1st square to form the 4 sides of the cube. I used a serger to sew, since the fabric frayed so much. You can simply use a regular sewing machine and zigzag the edges if you don't have a serger. If the fabric is non-fraying, you can just sew a straight stitch.

Cut the twill tape into 9" strips. Pin them into the seams of the 5th square on opposite side before stitching, to create handles.

Sew the 5th (top) square the edges of the 4 squares, to form the top of the cube.

Sew the 6th square to the bottom edge of one of the squares. This will be the bottom of the pouf, and will allow you to place the bladder inside before stitching it closed.

My "helper", Jensie watched over my first cover while I sewed the second one together. He thought it was for him I guess! :-)
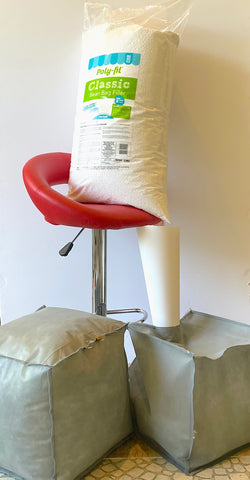
Now you're ready to fill the bladder! One bag fills 2 cubic feet, and is great for the squares.
Prop the bag of filler on a table or chair. Make a paper cone by rolling paper and taping it together to completely fill the opening on the Oly*fun cube.

Cut a small hole in one of the bottom corners of the bag and let gravity do its work.

Once the beads begin to flow they will fill all the areas of our project. Do not try to rush this process.

Take out the funnel and hold the edges together with binder clips to keep it shut while you hand sew the opening shut. Be sure that the stitches are smaller than the beads so that none escape.
(If you find that the filler is not enough to fill the entire cube, you can add more, or add poly-fil to completely fill the cube for firmness.)

Place the finished bladder into the fabric cover(s). Tuck the raw edges under on all 3 sides of the opening on the bottom of the cube, and pin into place.

Sew the opening closed with Dual Duty thread.

Using larger quilting pins or corsage pins worked great for me, since the upholstery fabric was so thick.

And you're DONE!


To find Oly*fun and Poly-Fil® Classic Bean Bag Filler, hop on over to my friends at Fairfield World!
www.fairfieldworld.com

